If you’ve had the unfortunate experience of having a malfunction in a fly-front zipper, you know it’s a finicky repair to make by machine. Here’s a method that combines machine and hand sewing for an expeditious fix.
This approach leaves all visible topstitching intact, and it doesn’t require you to unstitch the waistband. Therefore, the pants look exactly the same after the repair as before the zipper broke. And if you hesitate to install a zipper by hand, don’t worry: A properly sewn backstitch is quite sturdy. It’s the preferred stitch for many bespoke and couture construction techniques, including the crotch seam on trousers, where it’s considered strong enough to stand up to years of wear.
Remove the zipper without undoing any of the visible topstitching, and slide a new zipper into place. You’ll hand stitch one side to attach it invisibly.
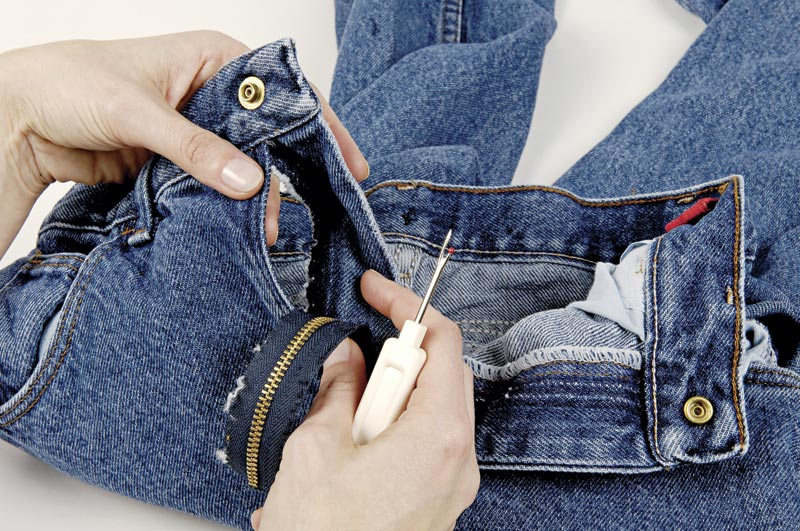
Working with a seam ripper, remove the stitches holding the original zipper in place. On the fly underlap, you’ll create a slot between the jeans front and the fly shield. On the overlap, simply pick out the stitches. At the waistband and bottom of the fly, cut the zipper tape to release the zipper. Don’t unstitch the waistband.
With the zipper right-side up, slide one side of the tape into the opening you created between the fly shield and the pants front. Fold the top of the tape under. Pin or baste the tape in position. Install a zipper foot on the sewing machine, and stitch the zipper close to the edge of the pants front, sewing from the top of the zipper as far down the tape as you can.